About a year and a half ago, I got a smart phone. It was great because my camera had just died, and it was so much faster to turn on than my camera had been! (It was pretty great for other reasons too... email, music, instagram, plants vs. zombies...) So, when I was laying out my quilts, I'd just snap a picture and keep referring to it whenever I needed to. Such a great idea! And sometimes it still works, but if I take another bunch of pictures of my kids, then it gets a little lost.
If I'm working on a really scrappy quilt, that's still pretty much the only way for me to go. But... sometimes I don't want to
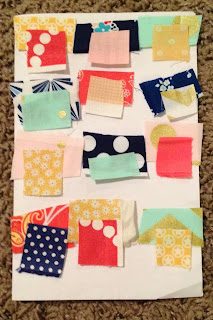
But then last night I had an epiphany -- why not sew it onto the paper? I'm not new to sewing on paper, and I have a special needle to use just for paper, so it was pretty simple to just tack it down. Here's what I did (isn't it cute?!):
So, I made a little tutorial on how I did it. First, I arranged the fabrics onto the paper. This was just a little project, so I only needed a half-sheet of paper. I really liked the extra stability of the doubled paper, so I'll definitely be using a double sheet in the future, even if it's a bigger project. I arranged these fabrics a few times -- I told you I'm
Then, I took off the top layer. I VERY carefully set it all in order to the side, and then used a glue stick to glue down the fabric in place.
Now, that glue is TOTALLY not going to hold your fabric for very long. So, very very carefully, you take the paper over to the sewing machine and tack it down with some quick stitching. I like to do it along the top edge of the fabric, just catching that top edge. The rest of the fabric will be a little loose, but that's okay, because gravity will take care of it for you. Hopefully you can see that in this next picture (the top edge is to the left in the picture):
After that's done, set the inner fabrics on top of the others, setting each one a little bit down from the top of the outer fabric. If you need to add a little bit of glue, it's best to just apply it to the paper. Then, sew down these fabrics just along the tops.
And now you're done! Hang it on your bulletin board -- even if it's super messy. :)
There's all sorts of treasures up there -- I can't get rid of a single thing. Do you see the sweet picture my little girl drew me? It's a portrait of me -- in case you couldn't tell. She is definitely a better artist than I am. :)
The best part about this method is that I can look at it all day long, and it keeps me on track so I don't have to worry about misplacing any of the pieces. I almost can't go wrong!


No comments:
Post a Comment
I love comments and try to respond to every one. Please let me know if you need clarification on something, want to know something, or especially if you LOVE something!