
Something that threw a little wrench in my plans for this quilt along was the fact that I really don't love all of the blocks. I think some of them just don't "speak" to me -- so I only want to do about 44 of the blocks. But we don't really need to do ALL the blocks, because we've got so many other quilters that will be guest posting their blocks. Plus, I don't have the time to do three blocks a week AND do other projects, and I don't need another twin-sized quilt -- so I'll just make this a lap-size and only do the blocks I really love. :)
{caveat: I was assigned 12 blocks, so some of those I'll love just as much, and some I'll probably only like... but the ones that take more work (read: applique) are definitely all ones I love!}
Okay, so now that I've realized I don't want to do everything, and I'm maybe going to change up the layout... where do I start? I always start with how big I'll be making the finished product, and work my way backwards. Since the finished product's borders can vary quite a bit, I'm going to pretend they just aren't there, and just work on the center of the quilt.
Because of the size of the blocks -- a teensy 6" finished -- I decided I wanted to use a little more background fabric and create some blank space for my eye to rest. The first layout idea is very similar to the layout Marie Henry used, but instead of filling each space with blocks, the "in between" blocks will be background fabric. I used a similar layout in my Peteetneet Quilt show challenge fabric entry, blogged in my intro to the quilt along here. I laid everything out in my super-high-tech quilt layout program (Excel for Windows), and took a screenshot:
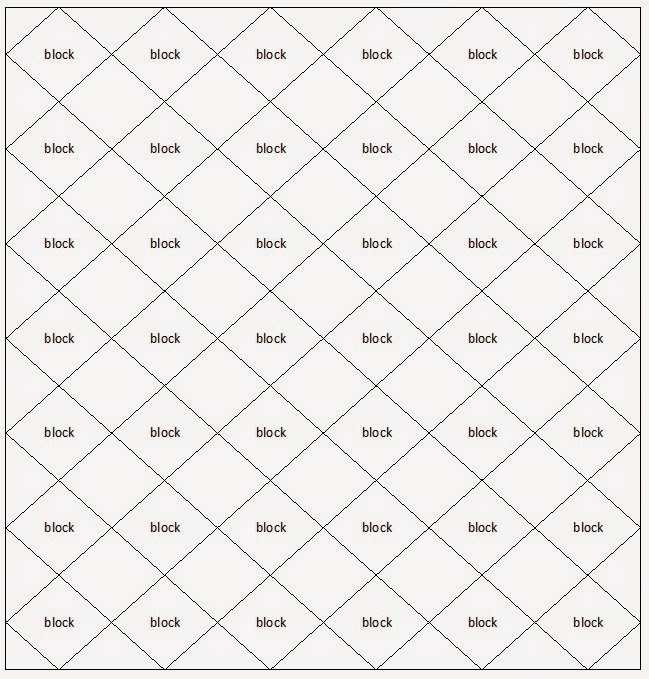
The fun part about this layout is that you can do the same amount of blocks as the original, and your quilt will have a very similar feel to the original layout -- but you'll only have to do 42 blocks instead of 72!
I had another idea, too -- one I'd seen in some of the Farmer's Wife quilt layouts, and really liked. Plus, the BEST part is that, because I really prefer most of the blocks straight-on, instead of turned on point, I could have the best of BOTH worlds! :) I laid it out in my "quilting" program again, and took another screenshot:

CALCULATING THE BACKGROUND FABRIC
Now that I've decided on layout, I need to figure out how much fabric EACH block will use, and how much of that measurement I can get from a width of fabric. I took a screenshot of how my brain works -- I really do have to write down every step of the problem, because I like to check my work at the end to really make sure it's right.

Plus, this little measurement estimator doesn't take into account the fact that almost every block has some sort of "background" fabric in it -- she used mostly prints, but I really like the idea of using that same background fabric so my blocks are floating. So, instead of taking that 1 3/4 yd. total, I'll add another yard and a quarter to make about 3 yds. -- and that's about how much I'll set aside for my quilt top.
One thing's for sure -- I will be making testers for each block BEFORE I cut out all my strips, but I'll let you know all about that next week, when I post about making my first blocks. It's going to be so fun!
I LOVE your new layout! Genius!
ReplyDelete