I started with the Indiana Rose block on page 75, and I think it's just so pretty -- don't you? I lined up my little star center first, using the old fold-the-background-fabric-in-half-both-ways-diagonally method, then layered the yellow and coral parts underneath, and ironed it all down one at a time. It went pretty quick, and I absolutely love this color combination!
The next block I did was Broken Dishes, on page 35. This one I did using the half-square triangle method where you put a piece of painter's tape on your machine 1/4" away from your needle (I lined mine up with the 1/4" foot and a ruler on my extension table to make it super straight) and then you feed your squares into the machine, keeping the diagonal points on the painter's tape. I sewed all my squares like this, then flipped them over and did the same thing on the opposite side of the block, so there was a 1/2" space in between the two seams, with the center of the block in the middle.
{If you need a better explanation of this, with video tutorial, please see Camille Roskelley's blog post on the subject.}
For these blocks, I used ten 2 1/2" square of each color, starched them really good and pressed them with the seams open, then trimmed them each to 1 1/2".
A little trick I used to make all the lines on the brown fabric go up & down, I lined up the blocks as I was sewing with half of the lines going towards the right, and half of them going towards the left. I used two finished squares of each type in each block, so they all came out going straight-ish up!
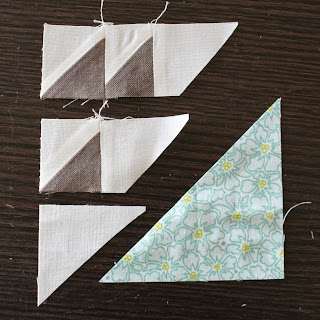
The last block, Old Maid's Puzzle from page 36, I did waaay different than I've done in the past. I decided I didn't want to paper-piece the little corner pieces, because I didn't want to have to mark my papers so much, and with such teensy pieces. So, instead I made half-square triangles, just like the Broken Dishes block, and starched them like crazy before I pressed them open. I know there are a lot of quilters who abhor open seams, but I really have to do it on these teeny tiny blocks or nothing matches up.
I figured I'd need 7/8" finished pieces for the dark & white sections, so I cut my squares at 2", and then cut them down to 1 3/8". I also cut six 2" white squares for the setting triangles, and cut them in half, and used two 3 1/2" squares of the blue, cut in half.
After everything was prepared, I sewed the squares and setting triangles into rows, and cut off the excess from the setting triangle to make a straight line at the bottom of each row.
Then I sewed the rows together.
When I was all done, I aligned the square corners in a corner on my cutting mat, and lined up my ruler so there was a 1/4" seam allowance away from the points of my dark triangles.
Then I sewed the two triangle parts together, and trimmed the block down to 3 1/8".
Finally, I cut four white strips and one coral square. I put everything together, and lucky me -- it turned out pretty close to 6 1/2" square!
I sure did enjoy having my blocks turn out just as pretty as I'd planned them -- I guess it's the curse of being the oldest child, but I just LOVE being right! :)


I'm so impressed that you got all those lines going the same direction on your Broken Dishes block! I think that would have been too much thinking for me. ;)
ReplyDeleteAlso, your old maids puzzle block turned out awesome!
Thank you! I figured out the straight line trick a few years ago -- I'm a leeeetle OCD about stuff like that. :)
Delete