This week, instead of doing my #BFTPqal blocks, I'll be finishing up some cute little apples for Teacher Appreciation Week. Here's a little preview -- I'll have more information a little later this week on how I made them and what we did for Teacher Appreciation Week last week. Apples for DAAAAYYYYYYYSSSSSS....
If you're looking for this week's blocks, Katie has them at Lady Fortune's Wheel.
Monday, April 20, 2015
Monday, April 13, 2015
#BFTPqal - pages 35, 36, & 75
Wahoo -- I'm not a pirate any more! I do have a couple more things to do for this week's Teacher Appreciation Week, but after that I feel like I'll be free at last!
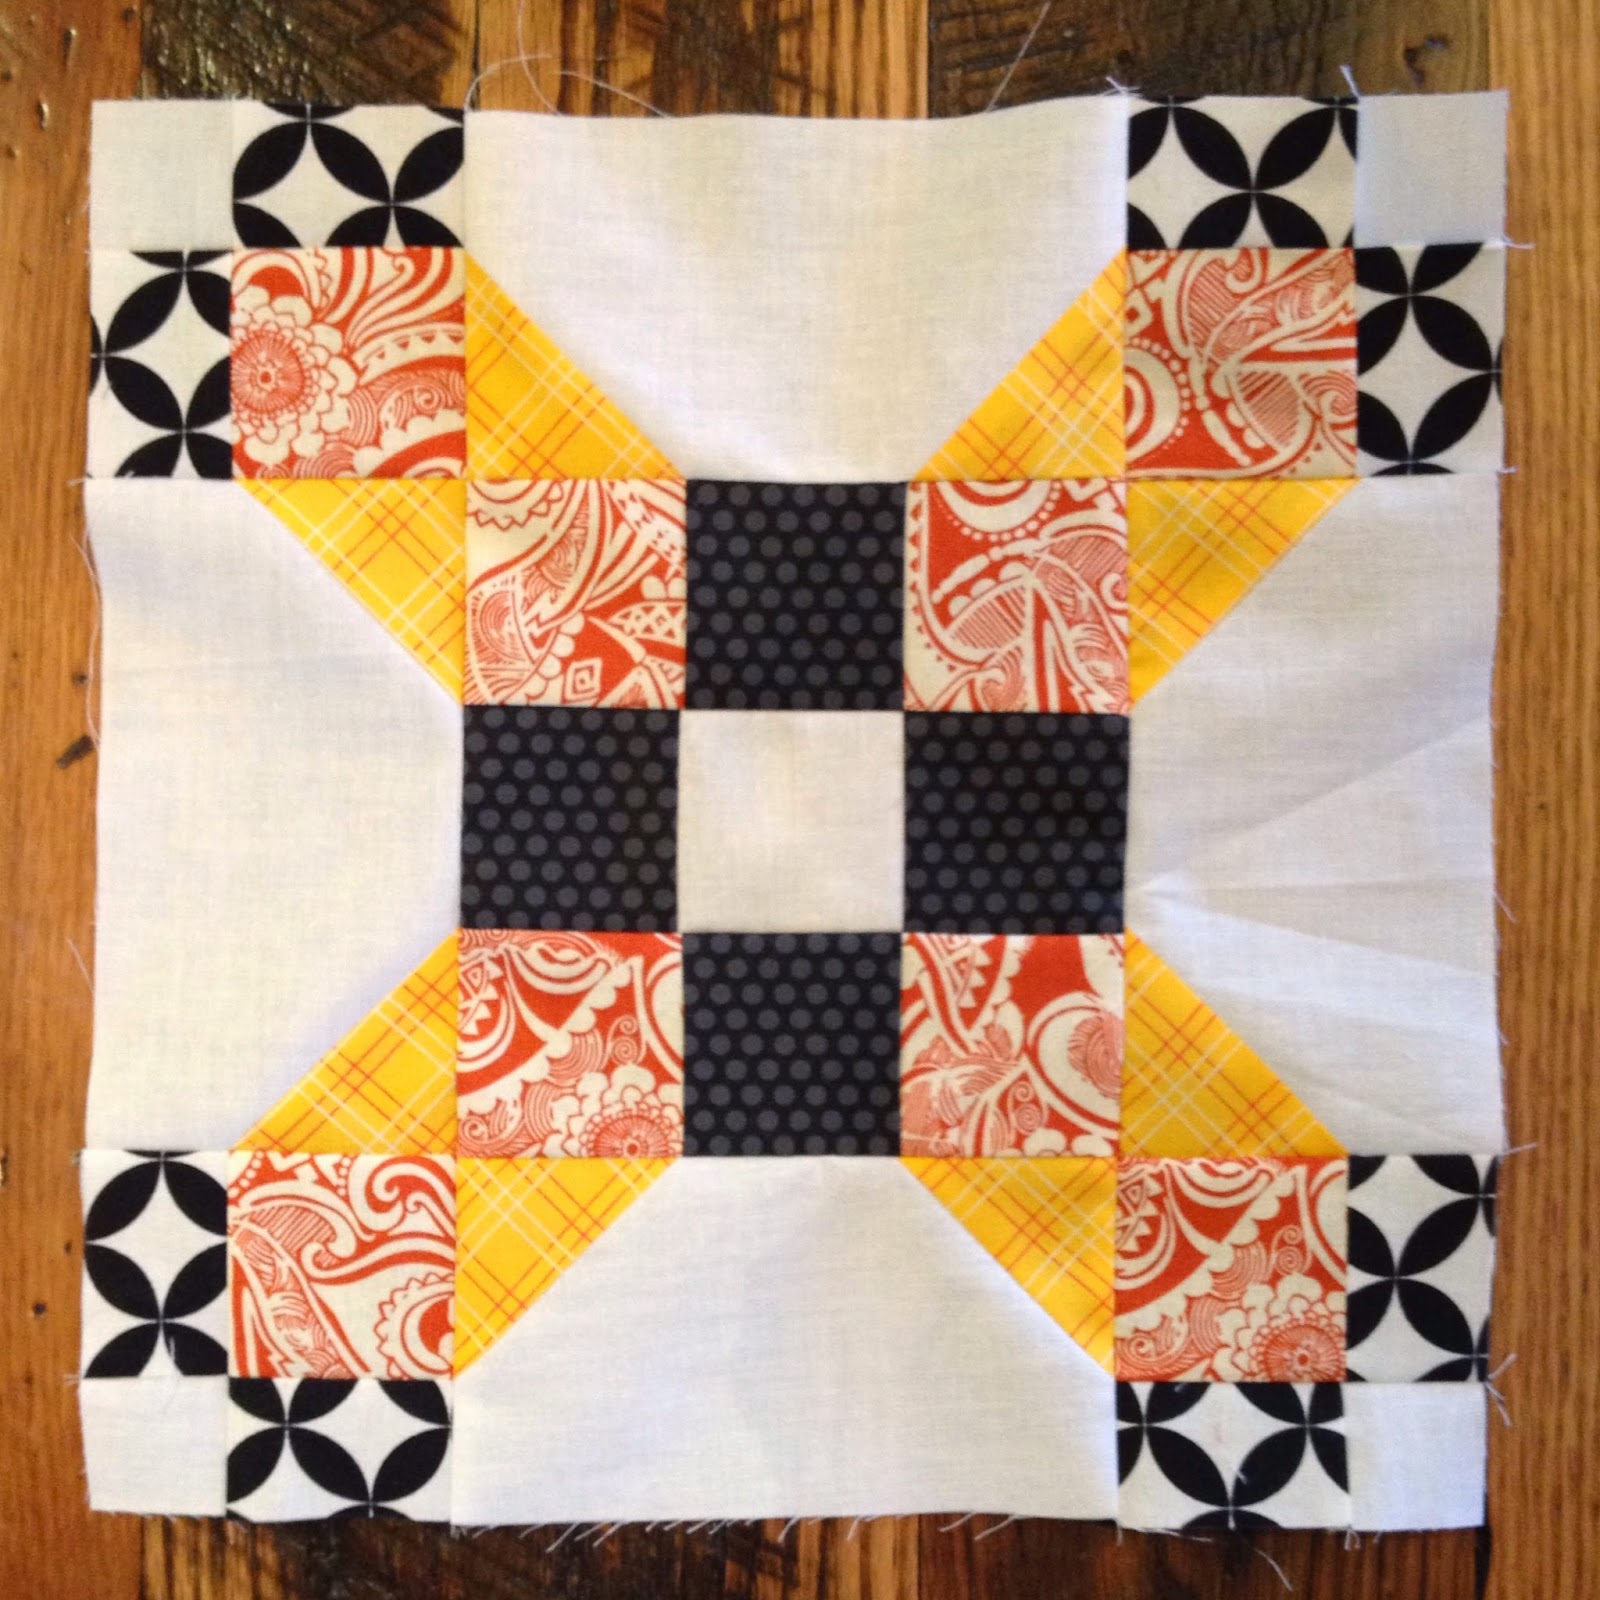
I started with the Indiana Rose block on page 75, and I think it's just so pretty -- don't you? I lined up my little star center first, using the old fold-the-background-fabric-in-half-both-ways-diagonally method, then layered the yellow and coral parts underneath, and ironed it all down one at a time. It went pretty quick, and I absolutely love this color combination!
The next block I did was Broken Dishes, on page 35. This one I did using the half-square triangle method where you put a piece of painter's tape on your machine 1/4" away from your needle (I lined mine up with the 1/4" foot and a ruler on my extension table to make it super straight) and then you feed your squares into the machine, keeping the diagonal points on the painter's tape. I sewed all my squares like this, then flipped them over and did the same thing on the opposite side of the block, so there was a 1/2" space in between the two seams, with the center of the block in the middle.
{If you need a better explanation of this, with video tutorial, please see Camille Roskelley's blog post on the subject.}
For these blocks, I used ten 2 1/2" square of each color, starched them really good and pressed them with the seams open, then trimmed them each to 1 1/2".
A little trick I used to make all the lines on the brown fabric go up & down, I lined up the blocks as I was sewing with half of the lines going towards the right, and half of them going towards the left. I used two finished squares of each type in each block, so they all came out going straight-ish up!
The last block, Old Maid's Puzzle from page 36, I did waaay different than I've done in the past. I decided I didn't want to paper-piece the little corner pieces, because I didn't want to have to mark my papers so much, and with such teensy pieces. So, instead I made half-square triangles, just like the Broken Dishes block, and starched them like crazy before I pressed them open. I know there are a lot of quilters who abhor open seams, but I really have to do it on these teeny tiny blocks or nothing matches up.
I figured I'd need 7/8" finished pieces for the dark & white sections, so I cut my squares at 2", and then cut them down to 1 3/8". I also cut six 2" white squares for the setting triangles, and cut them in half, and used two 3 1/2" squares of the blue, cut in half.
I started with the Indiana Rose block on page 75, and I think it's just so pretty -- don't you? I lined up my little star center first, using the old fold-the-background-fabric-in-half-both-ways-diagonally method, then layered the yellow and coral parts underneath, and ironed it all down one at a time. It went pretty quick, and I absolutely love this color combination!
The next block I did was Broken Dishes, on page 35. This one I did using the half-square triangle method where you put a piece of painter's tape on your machine 1/4" away from your needle (I lined mine up with the 1/4" foot and a ruler on my extension table to make it super straight) and then you feed your squares into the machine, keeping the diagonal points on the painter's tape. I sewed all my squares like this, then flipped them over and did the same thing on the opposite side of the block, so there was a 1/2" space in between the two seams, with the center of the block in the middle.
{If you need a better explanation of this, with video tutorial, please see Camille Roskelley's blog post on the subject.}
For these blocks, I used ten 2 1/2" square of each color, starched them really good and pressed them with the seams open, then trimmed them each to 1 1/2".
A little trick I used to make all the lines on the brown fabric go up & down, I lined up the blocks as I was sewing with half of the lines going towards the right, and half of them going towards the left. I used two finished squares of each type in each block, so they all came out going straight-ish up!
The last block, Old Maid's Puzzle from page 36, I did waaay different than I've done in the past. I decided I didn't want to paper-piece the little corner pieces, because I didn't want to have to mark my papers so much, and with such teensy pieces. So, instead I made half-square triangles, just like the Broken Dishes block, and starched them like crazy before I pressed them open. I know there are a lot of quilters who abhor open seams, but I really have to do it on these teeny tiny blocks or nothing matches up.
I figured I'd need 7/8" finished pieces for the dark & white sections, so I cut my squares at 2", and then cut them down to 1 3/8". I also cut six 2" white squares for the setting triangles, and cut them in half, and used two 3 1/2" squares of the blue, cut in half.
After everything was prepared, I sewed the squares and setting triangles into rows, and cut off the excess from the setting triangle to make a straight line at the bottom of each row.
Then I sewed the rows together.
When I was all done, I aligned the square corners in a corner on my cutting mat, and lined up my ruler so there was a 1/4" seam allowance away from the points of my dark triangles.
Then I sewed the two triangle parts together, and trimmed the block down to 3 1/8".
Finally, I cut four white strips and one coral square. I put everything together, and lucky me -- it turned out pretty close to 6 1/2" square!
I sure did enjoy having my blocks turn out just as pretty as I'd planned them -- I guess it's the curse of being the oldest child, but I just LOVE being right! :)
Thursday, April 2, 2015
Argh
Nope, I'm not a pirate -- I'm just doing a mean impersonation of one lately. I've got a few too many balls in the air, and this blog fell down. :( I'm crossing a couple of things off my list next week, though, so hopefully I'll be back on track with #BFTPqal and regularly scheduled posts by then!
Until then, the blog post for last week's #BFTPqal is up at my friend Barbie's blog, The Quilting Mill.
And the blog post for this week's #BFTPqal is up at my friend Tiffany's blog, Sewin' somethin'.
Next week will be Maggie at Shortcookie.
And after that I hope to be back on track!!
Until then, the blog post for last week's #BFTPqal is up at my friend Barbie's blog, The Quilting Mill.
And the blog post for this week's #BFTPqal is up at my friend Tiffany's blog, Sewin' somethin'.
Next week will be Maggie at Shortcookie.
And after that I hope to be back on track!!
Monday, March 16, 2015
#BFTPqal - pages 25, 26, & 69
First up is "Cross and Crown", from page 25. This block went together like a breeze -- but just because I paper-pieced it and adjusted the measurements. I mean, really, there is just no easy way to get 5 sections into a 6" block. So, I made up my paper-piecing patterns just like I did about a month ago. Again, I chose to have the center strips 1" finished, which meant each quarter was 2 1/2" finished -- which makes for some pretty easy quilt math, I think. :)
Second is "Cat's Cradle" on page 26. I decided not to do any background on this block, since it's written that way, but I'm not so sure about how I like the color placement after all.
And last is our applique block -- "Rose Wreath" from page 69. The bias strips I did just like the "Rose Spray" block I did a couple of months ago, and I used Heat-n-Bond lite for the roses. This was the fastest block of them all! I did a couple of things -- like using glue to baste the bias strips down -- just like it's outlined in the book, but what I did different (other than the Heat-n-Bond), was to do the circles in the center of the flowers UNDERNEATH the petals. I just really like that look better, and since I was fusing the petals anyway, I just fused them on top of the fabric I used for the centers. I did use a little glue underneath the flower centers as well, just to make sure everything will stick until I'm ready to quilt everything down.
Second is "Cat's Cradle" on page 26. I decided not to do any background on this block, since it's written that way, but I'm not so sure about how I like the color placement after all.
Thursday, March 12, 2015
Round Robin
About 2 years ago, I was approached by some friends (I can't remember who exactly started it) to join a Round Robin quilt swap. I've never done one before, but my Mom has, and it's been fun to see some of the things she's done for them -- and to see what she's come home with! The girls wanted an 18"-ish center, and there just aren't a whole lot of patterns out there written for 18", so I decided to try out a brand-new, never-before-seen, Natalie original pattern, which looked a little something like this:
The only problem was, I REALLY had a hard time letting go of this. Because I'd never really put myself into others' care, I really had a hard time trusting them to take care of my baby. Would they completely lose the center? What if they hated my block? What if they took it in a completely different direction -- and it came back to me and I hated it?
We had a rule that nobody could see their quilts during the swapping process, so it would be a total surprise at the end, so I stewed about things for a little while. And then, finally, I just had to let myself be okay with releasing my baby into the big, bad old world, and letting it grow up.
We had a phenominal group of quilters working on the swap, and I feel everyone really tried hard to give it their all. Sometimes a simple stop border was all the quilt needed -- and sometimes a really challenging border was needed. But it was really fun to have that mental challenge and stimulation, and I know now that everyone was really working hard to make great borders for everyone else.
The truth is, my quilt came back COMPLETELY changed. It really had grown up -- but I LOOOOVE the direction it took. When I got it back, the last girl had put a gorgeous ending border on it, but when I put it on my bed I realized that it would be too small to cover my sheets (especially with a 1-3% shrinkage factor). While I love my children dearly, this was MY quilt, and I really wanted it to go onto my bed.
So I decided to make one more 6" border, all the way around. And then I was stuck. There were so many amazing ideas in my quilt -- did I highlight the arrows? The braids? Did I repeat some of the center pattern? It seemed the choices were endless -- and I really, REALLY didn't want to mess up this beautiful quilt!
So I left it for about 6 months. In that time, I pulled it out at least 10 times, and put it on my bed a couple more times, and didn't get any inspiration at all. Then Christmas came and wiped me out, so all January I sketched out ideas and planned and finally came up with a plan. I decided to use all the same fabrics as the center to make four separate borders, with 6" farmer's-wife-inspired corners. The top border would be like Allison Harris's Scout pattern (which I already own), the bottom border would be a snail-trail design, the left side would be military stripes, and the right side would be a nod to the tribal/Navajo blanket design trend that's so popular right now.
As you can see below, that plan changed and evolved -- now it has simple, chubby plus signs on top (a friend told me it might be Puss in the Corner?), a cute block I found on Pinterest (bento box maybe?) for the bottom, and plain corners. The left and right sides stayed virtually the same as the plan.
* I couldn't decide which picture to post here -- so I posted both! You can see each side better in one picture, but not the other. Please don't mind my Halloween décor... or Parker (he really wanted to be in the picture -- that should have been my first clue!)... :)
I paper-pieced the military stripes (do you see it that way? I really think they look like that!) so they would have accurate center matches, and I think it worked out really nicely. If I had it to do over, I would have changed a couple of things about the placement on the left and right borders, but now that it's done I won't change a thing! The chubby plus signs and bottom border turned out EVEN CUTER than I had imagined, and I think the white background makes the whole quilt just a little lighter than it would have been without that extra border. I'm so, so pleased with the end result -- and I'll tell you right now, I would do another Round Robin in a heartbeat!
I did learn a couple of things the hard way. First, to respect others' work. I had an idea for one quilt to change a border, because I felt like it just didn't go with the rest of the quilt. In the end, I just added to that border, adding some applique on top of it. I feel like that was a much better choice -- and that it would have been so disrespectful to change the hard work someone else had done. Second, I am REALLY good at waiting for things -- sometimes the anticipation of a really fun present is better for me than the actual present. Now, don't get me wrong -- I ABSOLUTELY LOVE my quilt, but I was afraid right at the end that I wouldn't, and then I wouldn't even have anything else to look forward to! Third, I had to learn to trust other quilters with my own ideas. It was really hard for me, because I guess I'm a bit of a control freak, but I think it was so good that I reached out and did something outside my comfort zone -- I really grew from this experience, and I think it's made me even more prepared to write my patterns!
The only problem was, I REALLY had a hard time letting go of this. Because I'd never really put myself into others' care, I really had a hard time trusting them to take care of my baby. Would they completely lose the center? What if they hated my block? What if they took it in a completely different direction -- and it came back to me and I hated it?
We had a rule that nobody could see their quilts during the swapping process, so it would be a total surprise at the end, so I stewed about things for a little while. And then, finally, I just had to let myself be okay with releasing my baby into the big, bad old world, and letting it grow up.
We had a phenominal group of quilters working on the swap, and I feel everyone really tried hard to give it their all. Sometimes a simple stop border was all the quilt needed -- and sometimes a really challenging border was needed. But it was really fun to have that mental challenge and stimulation, and I know now that everyone was really working hard to make great borders for everyone else.
The truth is, my quilt came back COMPLETELY changed. It really had grown up -- but I LOOOOVE the direction it took. When I got it back, the last girl had put a gorgeous ending border on it, but when I put it on my bed I realized that it would be too small to cover my sheets (especially with a 1-3% shrinkage factor). While I love my children dearly, this was MY quilt, and I really wanted it to go onto my bed.
So I decided to make one more 6" border, all the way around. And then I was stuck. There were so many amazing ideas in my quilt -- did I highlight the arrows? The braids? Did I repeat some of the center pattern? It seemed the choices were endless -- and I really, REALLY didn't want to mess up this beautiful quilt!
So I left it for about 6 months. In that time, I pulled it out at least 10 times, and put it on my bed a couple more times, and didn't get any inspiration at all. Then Christmas came and wiped me out, so all January I sketched out ideas and planned and finally came up with a plan. I decided to use all the same fabrics as the center to make four separate borders, with 6" farmer's-wife-inspired corners. The top border would be like Allison Harris's Scout pattern (which I already own), the bottom border would be a snail-trail design, the left side would be military stripes, and the right side would be a nod to the tribal/Navajo blanket design trend that's so popular right now.
As you can see below, that plan changed and evolved -- now it has simple, chubby plus signs on top (a friend told me it might be Puss in the Corner?), a cute block I found on Pinterest (bento box maybe?) for the bottom, and plain corners. The left and right sides stayed virtually the same as the plan.
* I couldn't decide which picture to post here -- so I posted both! You can see each side better in one picture, but not the other. Please don't mind my Halloween décor... or Parker (he really wanted to be in the picture -- that should have been my first clue!)... :)
I paper-pieced the military stripes (do you see it that way? I really think they look like that!) so they would have accurate center matches, and I think it worked out really nicely. If I had it to do over, I would have changed a couple of things about the placement on the left and right borders, but now that it's done I won't change a thing! The chubby plus signs and bottom border turned out EVEN CUTER than I had imagined, and I think the white background makes the whole quilt just a little lighter than it would have been without that extra border. I'm so, so pleased with the end result -- and I'll tell you right now, I would do another Round Robin in a heartbeat!
I did learn a couple of things the hard way. First, to respect others' work. I had an idea for one quilt to change a border, because I felt like it just didn't go with the rest of the quilt. In the end, I just added to that border, adding some applique on top of it. I feel like that was a much better choice -- and that it would have been so disrespectful to change the hard work someone else had done. Second, I am REALLY good at waiting for things -- sometimes the anticipation of a really fun present is better for me than the actual present. Now, don't get me wrong -- I ABSOLUTELY LOVE my quilt, but I was afraid right at the end that I wouldn't, and then I wouldn't even have anything else to look forward to! Third, I had to learn to trust other quilters with my own ideas. It was really hard for me, because I guess I'm a bit of a control freak, but I think it was so good that I reached out and did something outside my comfort zone -- I really grew from this experience, and I think it's made me even more prepared to write my patterns!
Monday, March 9, 2015
Cabin Fever II & BFTP links
Well. I didn't remember to post last week, and I didn't get any blocks done for this week because I was busy getting ready for Cabin Fever II. I got to go on my birthday (and got one heck of a present from the ladies -- ever heard of Pinup Guys fabric??) through last Saturday, and it was so much fun!!
First of all, the links for last week's post is by our friend Ginny at Marion's blog, {here}. And for this week, it's Maggie at Shortcookie, and the links are {here}, {here}, and {here}. (if you can't access all the links, that means they're not all up yet -- at the time of this post there's only one. I'll delete this disclaimer when I've linked over to all of them.)
Okay, now on to Cabin Fever II. I was lucky enough to go to Cabin Fever in February of 2013, and that's where I decided I wanted to publish patterns. That meant I got an early pass to Cabin Fever II -- and it was a good thing, too, because the tickets were sold out before sales ever hit the public! We got to go up to a BEAUTIFUL cabin up Hobble Creek Canyon, just about 15 minutes away from my house. And all I did for three days was sew and sew and sew -- it was just like heaven!
I took waaay too much to work on, but I also managed to get quite a few projects completed. I did four baby quilt tops...
and two bee blocks (I'm part of the Beehive swarm #21)...
and five improv trees for my QBX group...
and one little secret project (this is one block of 36 that are complete).
For Christmas last year, Joel gave me a jelly roll of Lexington, by Minick and Simpson. At first glance, I thought it was pretty yuck -- it's not my style AT ALL, the colors are very muted, which I don't love. (Don't tell Joel -- he was really proud of his choice!) So, I decided that if Joel loved this jelly roll, I'd make him a quilt for his birthday. He's always a little sad that a lot of the quilts I make go to other people, haha. And as I worked with this jelly roll, I really fell in love with it -- it has so many really beautiful prints in it! And the colors really grew on me too. I think it will really be a pretty and unusual addition -- and it will be the PERFECT secret birthday present for Joel!
First of all, the links for last week's post is by our friend Ginny at Marion's blog, {here}. And for this week, it's Maggie at Shortcookie, and the links are {here}, {here}, and {here}. (if you can't access all the links, that means they're not all up yet -- at the time of this post there's only one. I'll delete this disclaimer when I've linked over to all of them.)
Okay, now on to Cabin Fever II. I was lucky enough to go to Cabin Fever in February of 2013, and that's where I decided I wanted to publish patterns. That meant I got an early pass to Cabin Fever II -- and it was a good thing, too, because the tickets were sold out before sales ever hit the public! We got to go up to a BEAUTIFUL cabin up Hobble Creek Canyon, just about 15 minutes away from my house. And all I did for three days was sew and sew and sew -- it was just like heaven!
I took waaay too much to work on, but I also managed to get quite a few projects completed. I did four baby quilt tops...
and two bee blocks (I'm part of the Beehive swarm #21)...
and five improv trees for my QBX group...
and one little secret project (this is one block of 36 that are complete).
For Christmas last year, Joel gave me a jelly roll of Lexington, by Minick and Simpson. At first glance, I thought it was pretty yuck -- it's not my style AT ALL, the colors are very muted, which I don't love. (Don't tell Joel -- he was really proud of his choice!) So, I decided that if Joel loved this jelly roll, I'd make him a quilt for his birthday. He's always a little sad that a lot of the quilts I make go to other people, haha. And as I worked with this jelly roll, I really fell in love with it -- it has so many really beautiful prints in it! And the colors really grew on me too. I think it will really be a pretty and unusual addition -- and it will be the PERFECT secret birthday present for Joel!
Tuesday, February 24, 2015
BFTPqal pages 19, 20, & 66
Sorry we're a day late today -- we had a leetle mixup in our schedule, but here we are! Our next round of blocks were made by Terry Griffin, who has the CUTEST pattern shop {HERE}. Please take a minute and go there -- you won't be sorry! She had some of the cutest quilts and table runners -- I just want to make them all! I have a goal to make a table runner for every season and holiday, and these are a great way to do just that. I got to go with Terry to Quilt Market last May, and it was so, so much fun! I'd go with her again in a heartbeat. :) Terry uses a couple of techniques that are different from what I usually do, so I'll have to try those and see what I like best.
Here's Terry's post:
I got to do the "Grandmother's Choice, Anvil and Friendship Basket" blocks from the "Blocks From The Past".
Actually, going "modern" is really out of my comfort zone......but, I have really enjoyed using solids...although I still couldn't do the white background!! I remember too many days of scrubbing stains from and ironing white table clothes, pillow cases and sheets, at my Grandma's!
I was at Quiltique in Henderson, NV, (what a shop-loved it) and found the latest collection of Kona Solids and decided I could work with them. Since the blocks were from the "past" I decided to do the piecing by hand, using my grandmother's technique; a small running stitch with a backstitch every three or four stitches to lock the seam. This worked great since (as most of you know) I have a son who requires 24/7 care and when I sit with him in the evenings, turning the TV channels, getting Trail Mix, answering the phone for him, etc. etc.. If I don't have something to keep my hands busy I go crazy!!
I first marked 1/4" seams, with a pencil, on all sides of the lightest solids.
Then I matched corresponding pieces and pinned the intersecting points.
Using a Size 11 milliners/straw needle, I stitched the seams with a small running stitch. I also used Jill Finley's Polk-A-Dot sticky thimbles. They are great! As I pieced, I pressed the seams to the dark side.
Oh, what fun!!!
"Grandmother's Choice"
More Fun!
"Anvil"
"Friendship Baskets"
The "Friendship Baskets" block was considered an applique block since the handles were appliqued to the background fabric. Because these were straight lines, I followed the pattern and pressed the 3/4" strip into thirds. When I do curved applique, I like to use Kim Diehl's method of applique using freezer paper.
I really enjoyed this project....I think I will finish the whole book of blocks!!!
Marion and Natalie thanks for letting me participate.
Here's Terry's post:
I got to do the "Grandmother's Choice, Anvil and Friendship Basket" blocks from the "Blocks From The Past".
Actually, going "modern" is really out of my comfort zone......but, I have really enjoyed using solids...although I still couldn't do the white background!! I remember too many days of scrubbing stains from and ironing white table clothes, pillow cases and sheets, at my Grandma's!
I was at Quiltique in Henderson, NV, (what a shop-loved it) and found the latest collection of Kona Solids and decided I could work with them. Since the blocks were from the "past" I decided to do the piecing by hand, using my grandmother's technique; a small running stitch with a backstitch every three or four stitches to lock the seam. This worked great since (as most of you know) I have a son who requires 24/7 care and when I sit with him in the evenings, turning the TV channels, getting Trail Mix, answering the phone for him, etc. etc.. If I don't have something to keep my hands busy I go crazy!!
I first marked 1/4" seams, with a pencil, on all sides of the lightest solids.
Then I matched corresponding pieces and pinned the intersecting points.
Using a Size 11 milliners/straw needle, I stitched the seams with a small running stitch. I also used Jill Finley's Polk-A-Dot sticky thimbles. They are great! As I pieced, I pressed the seams to the dark side.
Oh, what fun!!!
"Grandmother's Choice"
More Fun!
"Anvil"
"Friendship Baskets"
The "Friendship Baskets" block was considered an applique block since the handles were appliqued to the background fabric. Because these were straight lines, I followed the pattern and pressed the 3/4" strip into thirds. When I do curved applique, I like to use Kim Diehl's method of applique using freezer paper.
I really enjoyed this project....I think I will finish the whole book of blocks!!!
Marion and Natalie thanks for letting me participate.
Subscribe to:
Posts (Atom)