Tuesday, March 18, 2014

Avoidance Behavior

I don't know why, but lately I've been avoiding quilting a little bit. I think it's just that I'm a little stressed out -- Joel is out of town this week and I'm in charge of Teacher Appreciation Week next week. Last week I even had a good, ugly cry.  Okay, maybe I'm actually a lot stressed out! I'm not used to being a single parent (and it's a good thing I'm not -- because I really don't do it very well) and last time I did Teacher Appreciation Week it was a HUGE time-suck and basically the WORST experience.

So... instead of quilting, I've been watching Dr. Who and White Collar and working on my "Once Upon a Time" cross-stitch sampler...

I won some fabric!  From Sarcastic Quilter's #sweatandsew Instagram giveaway.  This is HUGE, because I have never, ever won anything (except a date once... and it was the worst ever date I've ever been on).  But it all started with a giveaway Lindsey from "Happier Than a Bird" did, she gave me a ton of scraps I've used a lot recently.  The only problem is, this is a really great fabric collection, but I have NO idea what to do with it...

I made a sweet little needle book to help round up my needles.  Here are the pages -- I used the "nana and company" needle book tutorial, but I didn't want my embroidery stitches to be exposed (or worse -- to fray), so I added some fusible to the back of some fabric and attached it to the back of the pages.  I think it turned out pretty darn cute!  And now I have more room for my needles than I need -- it's so great!


Then I made a stand for my Kindle... so that I can watch shows while I quilt... in the future...
 
And then I made a case for my Kindle to go inside, while it's put away. Now that all's said and done, I wish I'd used the case colors for the stand, but oh well.  I don't remember where I saw this idea (although I'm pretty sure I pinned it on my "Sewing" board on Pinterest), but I LOOOVE the ruffles!
 
I totally love this back pocket so much -- I wanted to keep the cord with everything else, and of course I couldn't just leave that pocket plain. :) I knew I needed to make a really small block, and came up with this one. Because it was so, so small (those white corner background pieces are only 1/4" finished!), I made a little paper piecing template to help me out. I guess I didn't totally avoid quilting, either, did I? 
 

Now I don't have any more little projects to do, so I guess it's time to get serious about quilting again, right? Or maybe I should make some pillows...
 

Tuesday, March 11, 2014

Swatch Board

So, I've always been pretty anal particular about color placement in my quilts. The thought of putting all my scraps in a paper bag and just taking fabric out piece by piece literally makes me feel super jittery.

About a year and a half ago, I got a smart phone. It was great because my camera had just died, and it was so much faster to turn on than my camera had been! (It was pretty great for other reasons too... email, music, instagram, plants vs. zombies...) So, when I was laying out my quilts, I'd just snap a picture and keep referring to it whenever I needed to. Such a great idea! And sometimes it still works, but if I take another bunch of pictures of my kids, then it gets a little lost.

 If I'm working on a really scrappy quilt, that's still pretty much the only way for me to go. But... sometimes I don't want to get distracted by instagram go searching for that picture. I have a really messy bulletin board in my sewing room, and it's the perfect place for me to put a little swatch of what I'm going to put on my quilt. I've done it a couple of times before, but I've always had a hard time getting the fabric to stick to the paper. I've tried tape, and staples, and nothing was really great.
But then last night I had an epiphany -- why not sew it onto the paper? I'm not new to sewing on paper, and I have a special needle to use just for paper, so it was pretty simple to just tack it down. Here's what I did (isn't it cute?!):

So, I made a little tutorial on how I did it.  First, I arranged the fabrics onto the paper. This was just a little project, so I only needed a half-sheet of paper. I really liked the extra stability of the doubled paper, so I'll definitely be using a double sheet in the future, even if it's a bigger project. I arranged these fabrics a few times -- I told you I'm picky careful! I have an outer and an inner fabric for this project, so I made the outer fabric around 1" x 2", and the inner 1" x 1" so I could keep them straight. Please note the green fabric on the top row in the middle -- I totally used selvedges whenever I can, so I'm only taking away about 1/2" of usable fabric. 

Then, I took off the top layer. I VERY carefully set it all in order to the side, and then used a glue stick to glue down the fabric in place.

Now, that glue is TOTALLY not going to hold your fabric for very long. So, very very carefully, you take the paper over to the sewing machine and tack it down with some quick stitching. I like to do it along the top edge of the fabric, just catching that top edge. The rest of the fabric will be a little loose, but that's okay, because gravity will take care of it for you.  Hopefully you can see that in this next picture (the top edge is to the left in the picture):

After that's done, set the inner fabrics on top of the others, setting each one a little bit down from the top of the outer fabric. If you need to add a little bit of glue, it's best to just apply it to the paper. Then, sew down these fabrics just along the tops.

And now you're done! Hang it on your bulletin board -- even if it's super messy. :)

There's all sorts of treasures up there -- I can't get rid of a single thing.  Do you see the sweet picture my little girl drew me? It's a portrait of me -- in case you couldn't tell. She is definitely a better artist than I am. :) 

The best part about this method is that I can look at it all day long, and it keeps me on track so I don't have to worry about misplacing any of the pieces.  I almost can't go wrong!


Friday, March 7, 2014

Kiddos and a Half-Square Triangle Trick

These are my two littlest kiddos stringing buttons.  Aren't they the cutest?  It kept them occupied for about an hour, and took me back down memory lane -- I used to do this all the time when I was little!  And sometimes not so little -- I remember teaching some of my babysitting charges about stringing buttons. :)  It has absolutely nothing to do with the rest of this post, it was just a really fun morning with my littles that I know I'll want to remember!

Okay, back to our regularly scheduled post.  Most of the patterns I work with have you make half-square triangles by putting two squares together, drawing a line and sewing 1/4" on either side of the line, then cutting them apart and squaring up. I love this method, as there's relatively little waste, but it makes me cranky to draw those little lines if I have to do a bunch of them.  So, here's a little trick I learned in the army.  And for the record, I have never been in the army.  I mean absolutely NO disrespect to anyone in the armed forces, I really value and appreciate all the hard work and service they give to our country!  It's just a funny expression I picked up from my dad (he says it all the time!), and he was never in the army either -- it means I had to figure it out all on my own. :)

First, cut your squares to the desired size.  For example, if you want a 3" unfinished square, cut your squares to 3 3/8" if you don't want to square up, and 3 1/2" if you do want to square up.  (FYI, if this is a quilt just for our family, I love to not square up; but if it's for someone else or I'm going to show it somewhere, I'll square it up so I can be more accurate.) 


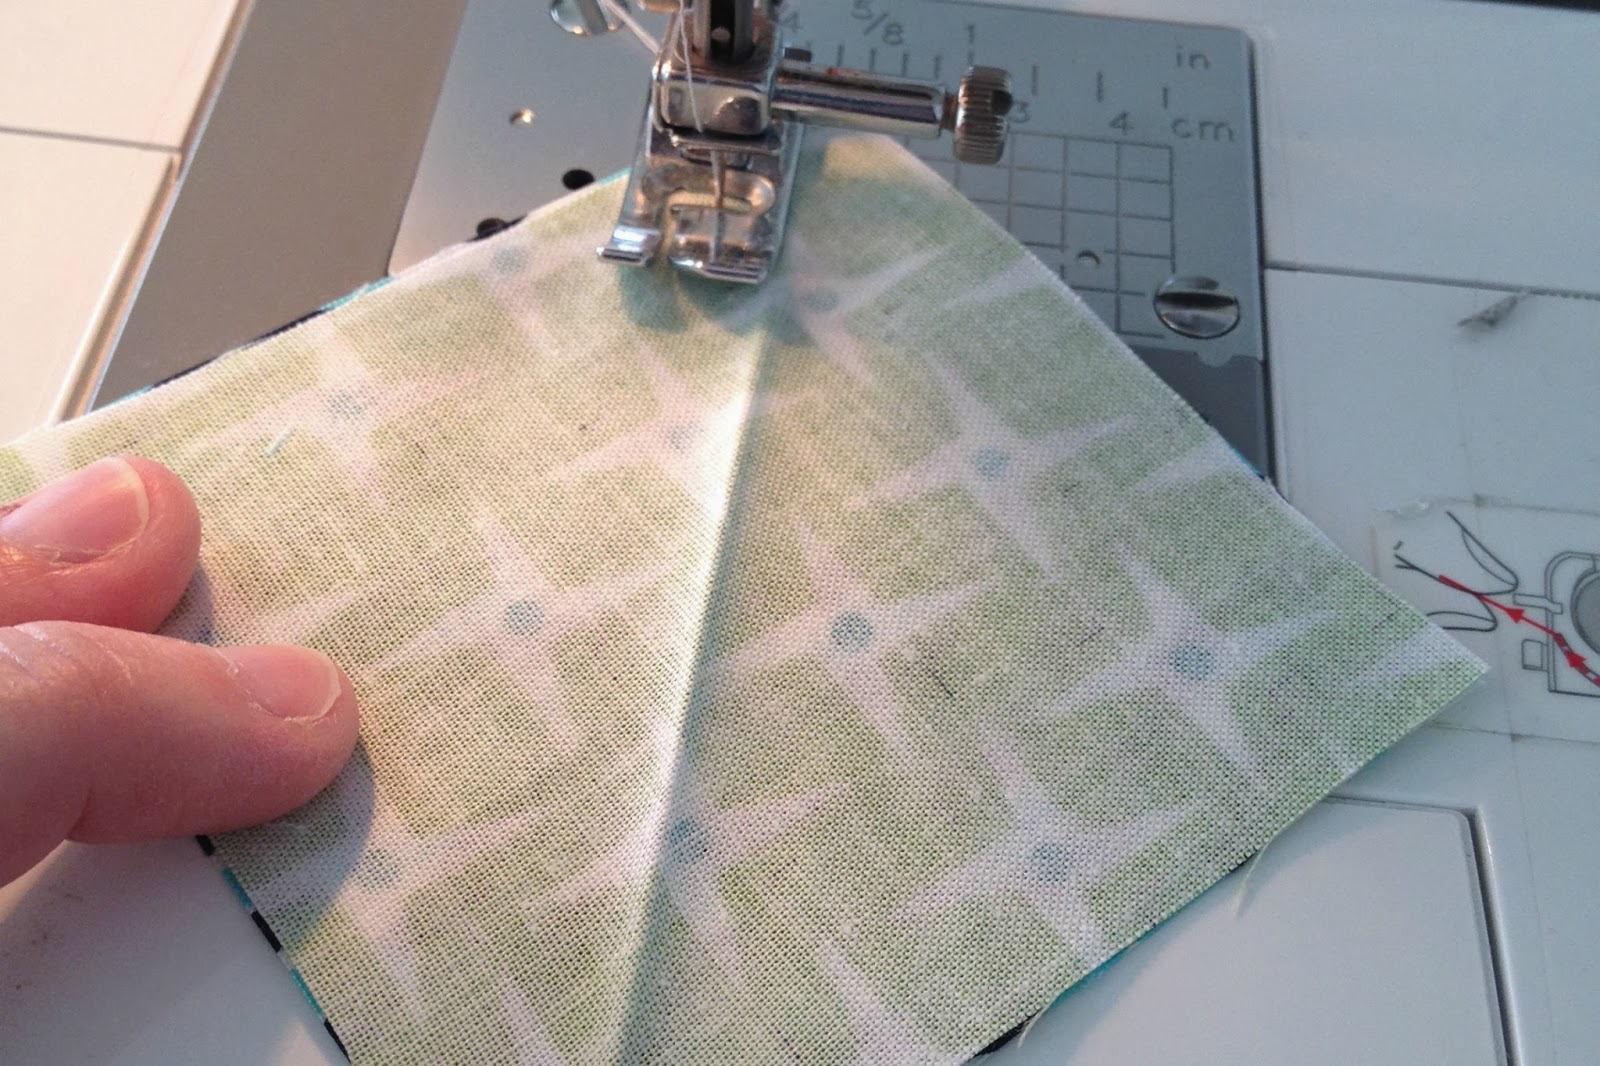
Next, take your fabric over to the iron.  Iron just one of the squares, diagonally.  I just press it really lightly, so as not to distort the fabric.  It takes about a second, and then I don't have to worry about any pencil marks bleeding through.  And if the mark doesn't quite line up on both sides, it's easy to re-iron, and you don't have to worry about which pencil mark to follow.  Not that I've ever done that...


Sew 1/4" on either side of the line, just as you would with a drawn line.


Press seams to one side, and square up if desired.  Now you have the cutest little half-square triangles!


I've used this method for half-square triangles and flying geese, but I can only recommend them for larger blocks, because the folding does introduce a tiny bit of inaccuracy in piecing.  If you're trying to be really accurate, especially with smaller piecing, please still mark your squares -- you'll be much happier with the result.  But if you're doing a big half-square triangle or you're going to square up anyway -- go for the iron!

Tuesday, February 25, 2014

Numbers Game

Number of quilts in my house right now: 14
 
Number of days I quilt in a week: 5-7
 
Number of table runners: 2 finished, 2 in progress

Number of quilts on beds: 2
 
Number of quilts in my living room: 4

Number of quilts in my living room that were originally intended for camping: 3
(yes, this is a gratuitous Kate shot, but there are
 three little camping quilts rolled up in that basket!)

Number of quilts in progress that will go on beds: 4

Number of quilts in progress that are for patterns: 4  

Total number of quilts in progress:

Friday, February 14, 2014

Christmas Box Quilt - Tutorial

Happy Valentine's Day!  Of course, since it's Valentine's, I'm posting about a Christmas quilt... but you could definitely do this in reds and pinks and make it more valentine-y if you'd like! :)

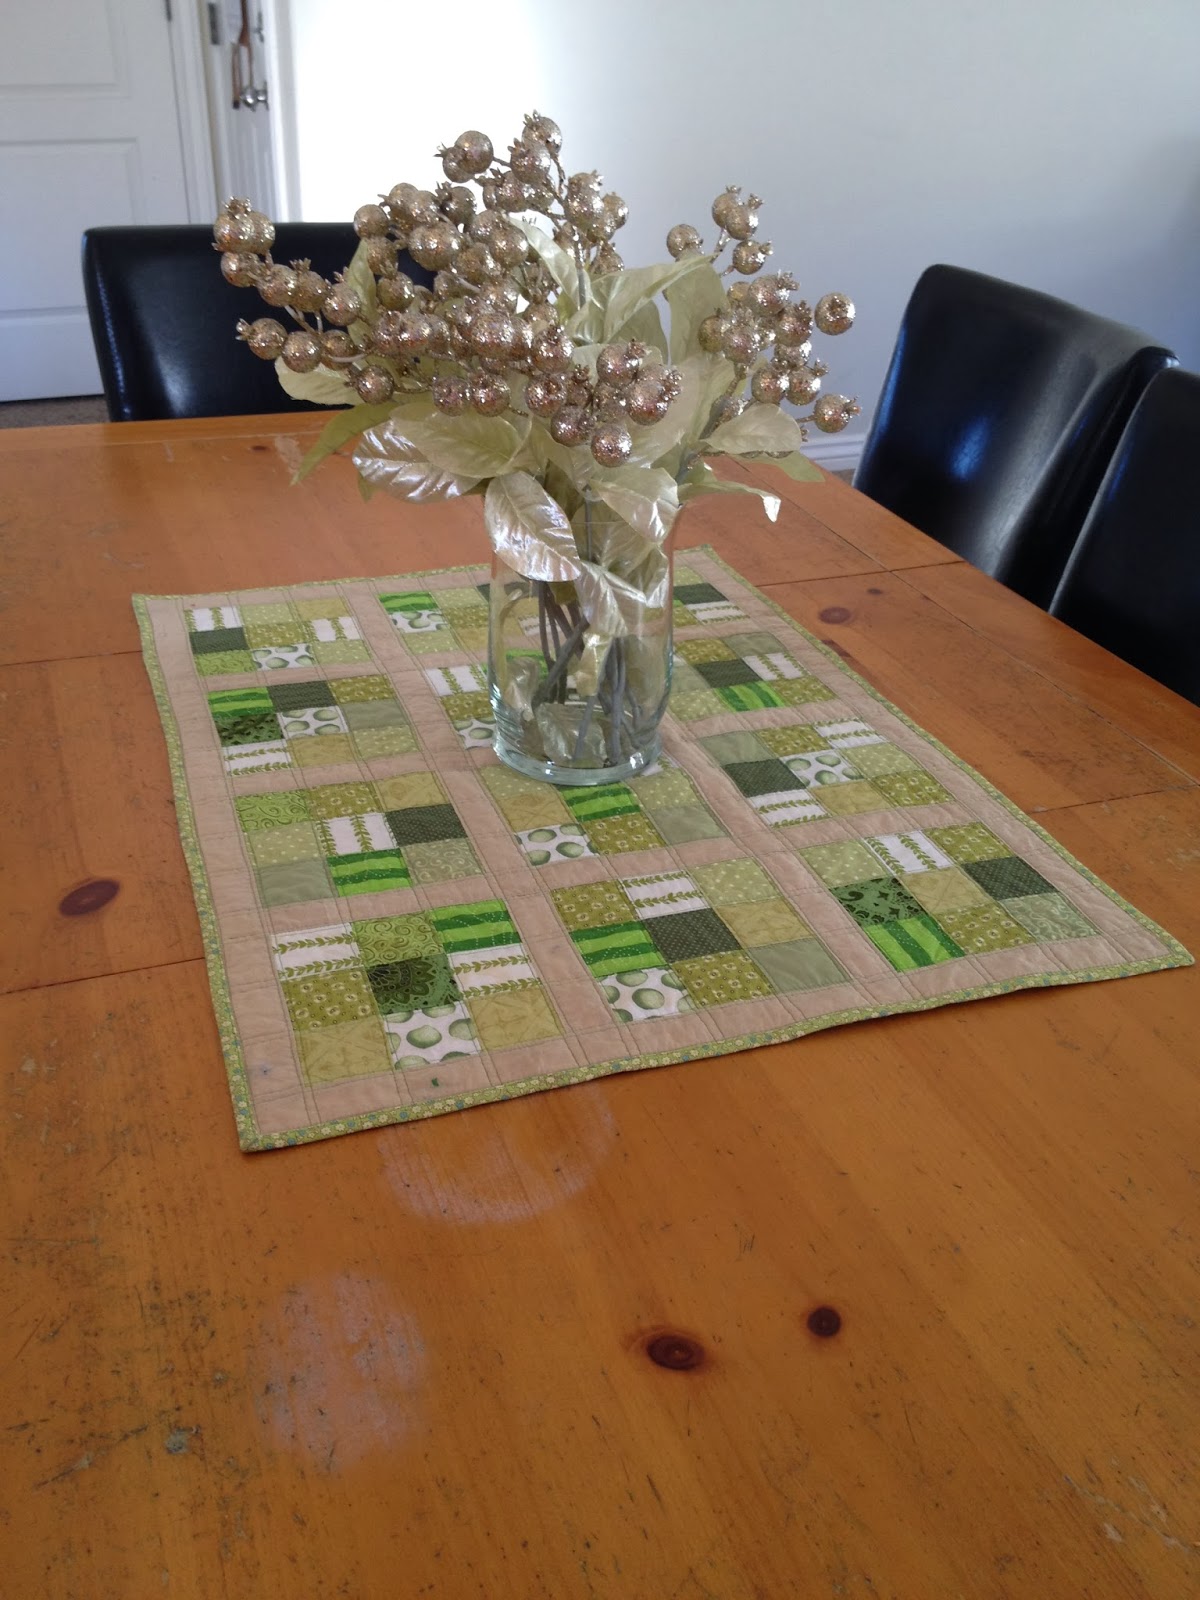
Remember those adoption quilts I made?  Well, since I couldn't find the pattern anywhere, I just came up with it on my own -- and thought I'd share it with you! I decided to call it the Christmas Box quilt, since I gave this quilt to my bro & sis-in-law for Christmas this year.  It was so fast and fun, and I think it looks like little packages of Christmas-y goodness, all lined up! 

The quilting took as long as the piecing, because I decided to try out a new design.  I don't think I did half bad, do you?

Now -- are you ready to try?  First, decide how many blocks you want to make.  You can see that I made this quilt 4 rows of 3, so I made 12 blocks.  This made a great lap-sized quilt, and it was so fun I'm planning to make one for my own family this Christmas!
 
For each block, you will need:
 
one 6 1/2" square (red)
two 3 1/2" x 6 1/2" rectangles in three contrasting fabrics (green)

Cut out as many blocks as you'd like to make.  I made half my centers red and half green, so please plan accordingly if you're going for the same look.  For my blocks, sashing, and borders, I just used scraps of fabric I already had, so I can't give you any measurements on yardage, but I'm sure you can figure that out -- or, the quilt shop ladies can. :)

First, lay out your block so there one pair is on either side of the block, and the other two pairs are at the top & bottom.  Make sure you place the two top & bottom pairs on opposite sides (for example, my green dot is in the upper right and lower left corners).

Next, sew each row together. Press well.

Then, sew the rows together.  Press the whole block.  See? Easy as pie! Now, just repeat that for as many blocks as you'd like for your quilt.

*note: Of course, I forgot to take pictures of the rest of this, so you'll have to refer to the first picture in this post for the rest of the instructions.  Sorry!*

After piecing all the blocks, you will need sashing strips that are 3 1/2" x 12 1/2" (my white fabric), and cornerstones (the little squares of color) that are 3 1/2" square.  Make enough sashing strips that you have one in between each block, but not on the edges.  (For my quilt I had 17 sashing strips and 6 cornerstones.)

Sew together in rows as follows:
Row one (with blocks): block, sashing strip, block... etc. *
Row two (just sashing): sashing strip, cornerstone, sashing strip... etc.
Repeat as many times as necessary for you to get the rows desired.  (This is for the main part of the quilt, with blocks on all sides -- you will put the borders on later.)  Press rows in one direction (e.g., all seams pointing to the left for row one, all seams pointing to the right for row two).
*When you're putting the rows together, keep in mind that you will rotate the squares so the middle contrasting fabric is in a different place each time -- for example, it will be on the sides first, then at top & bottom next, then back to the sides, etc.)*

Now, sew the rows together.  The seams for each block and sashing strip should line up -- see how great that is? :)

For the edges (aka borders, in quilt-speak), you need two strips that are 3 1/2" x the length of the quilt (i.e., side measurements), and two strips that are 3 1/2" x the width of the quilt (i.e., top & bottom measurements).  I like to just figure out how much that is using plain old math -- for example, for the length measurement, I take both side measurements and the center length measurement, add those three measurements together, and divide by three.  This is the measurement you'll use for your borders.  Who said math never came in handy after High School? :) #mathnerdsunite

Once you have the borders on, it's time to quilt! You can quilt it by hand on a frame, or baste it and quilt it by hand in front of the TV (this is a GREAT project for Downton Abbey -- you'll feel so "period"!), or machine quilt it, or send it out to be quilted.  There are so many options for quilting!  That's why most patterns (including mine) say "quilt as desired". :)

After that, you cute 2 1/2" strips and bind the quilt.  There are tons of binding tutorials out there -- just google it if you need more info!  I used 2 1/2" strips in varying lengths to make a scrappy binding, and I thought it was a really fun choice for this super scrappy quilt.

Last step -- snuggle with this quilt in front of your Christmas tree with a steaming cup of hot chocolate (or your drink of preference) and feel so pleased with yourself for doing it!  Even if you've made a bunch of quilts, this one will still give you a great sense of accomplishment, and it's so Christmas-y and fun, you might just have to make one for everyday, too!

Please let me know if you make one of these -- you can comment here, or tag me on instagram as smileynannn (yes, those are three "n"s -- ridiculous, but I wanted to be myself everywhere! :)  I'd love to see anything you've made!

Tuesday, February 11, 2014

A List Person

 
I think it's safe to say, I'm a list person.   I have lists for each day, week, and month of the year, lists of all the fun we're going to have as a family, lists of projects to do around the house ... and lists and lists of projects and ideas.  Joel always jokes about it, but I think it really helps me stay organized -- and besides, if I don't have a list, I might forget something I REALLY want to do! (or buy. or read. :)

This is a little snapshot of the list I made for February -- it's ambitious, and I think I might be behind already (is it Tuesday ALREADY?!), but if I can work on MOST of this list, I think February might be a pretty good month for all I want to accomplish!

One more thing... I made this list on Saturday, which was the end of Week 3-9... isn't it amazing I checked everything off that week? :) Do you ever make a list with things you've already done, just so you have something to check off? I know my sisters and I do!

Friday, February 7, 2014

How to Make the Cutest Cards Ever

I just love to make homemade cards. They are the perfect little gift for teachers, Mother's Day, or really for anything big or small. I include cards with envelopes for quilts I make, and plan to make little ones for each etsy order I fill. (clarification: I am in the process of opening an etsy shop, but haven't completed the setup of it yet. Don't worry -- I'll keep you informed!)

So, you'd like to make some, too? No problem! Here's a quick tutorial and my method. You'll need:
- a piece of cardstock, folded and cut to your desired size (I also like to round my corners; you'll see that in this post)
- scraps of fabric
- an old-ish needle for your sewing machine

 
See how easy this is? The rest of it is a piece of cake, too!

First, lay out your fabrics on top of your card. They don't have to be precise, just give yourself an idea of where you want things to go.

Next, start cutting out your fabrics. On this example, I used a rotary cutter to fussy cut the bicycle and make my edges nice & sharp. Later on, I'll give an example of one I did with scissors that's just as cute!

Now, start sewing! Begin with the bottom layer, and make sure you start in a corner that is NOT covered by your second fabric. Cut off your tails about halfway through so you don't sew over them. I like to use a very small seam allowance -- about 1/8" -- although if I'm using a selvedge that has a rough edge I sometimes use about 3/8". It just depends on what you like!
 
Keeping the needle in the first layer, position all the layers on top to see where the second layer should be positioned.
 
Do not clip the threads, just lift the presser foot and scootch the card over to where you want to start (in this picture, you can see I've left the threads attached between the green & blue fabrics). Sew the second layer -- just remember to start in a corner that won't be covered by your third fabric. If the tails will be covered, clip JUST the top thread (the bottom thread will not be cut at all).

Now it's time for the last layer! Position it in place, then sew on top.
 
When you are finished sewing all sides, clip the threads and clip all remaining top threads.  In this picture, you can see the back of the card, where I've left all the bottom threads unclipped.

And now you have the cutest little card ever! These big ones are just a half-sheet of 8 1/2" x 11" cardstock, folded in half. I usually put them with some size A4 kraft paper envelopes, and they're super cute for a birthday, Christmas, or just a fun note to Mom.

I gave a set of these cards to my Mom & Mother-in-law for Mother's Day last year, and I think they turned out so sweet! I thought 8 was the perfect number for a pretty little set for each of them.
 

And my favorite size is actually this teeny tiny little one -- it's just a scrap of cardstock, folded in half, and it's perfect to accompany a gift! I included a spool of thread so you could see just how teensy it is.  I don't have envelopes for these, but I think they're cute enough to just attach to the front of a gift. Sometimes I'll even punch a hole in the corner and lace it onto some curling ribbon -- but only if I have the time! :)

I sure hope you liked these little cards -- I think they're pretty sweet, myself! If you make some, please let me know!