Tuesday, September 29, 2015

2016 Primary & Youth Cross Stitch

I was recently called to be the Primary Chorister in my ward*. I was super sad to leave Young Women, because I truly had such love in my heart for those good kids! But I love those cute little Primary guys too -- even the naughty boys in back who think they're too cool to sing. They're not too cool when I threaten them with solos! (hee hee hee -- I might be just a little bit ornery about that.)

*in my church, the members are "called to" or "released from" certain positions as needed -- we don't do it for pay, it's all volunteer. We believe that Heavenly Father calls us to these positions through the Bishop, Stake President, or other leaders. The Primary Chorister leads the singing time for Jr. and Sr. Primaries -- meaning the kids from 3-12 that attend our ward. In our ward, we have a BUNCH of little guys, so they are split into two groups and I teach them church songs.

So, I decided to make a new cross stitch for General Conference -- my Young Women torch is almost done! And since I'm in Primary, I thought a simple, fun Primary theme pattern would be good.  I came up with a boy and a girl version, as you can see here:

2016 Primary Theme - Girl

2016 Primary Theme - Boy

But then a funny thing happened last Tuesday -- the Stake Executive Secretary called me to meet with the Stake Presidency. I went in with no expectations at all -- I thought I might be on a panel discussion or something -- and lo and behold, I am now the Stake Camp Director! (This means I'm in charge of all the Young Women at our annual week-long Young Women Camp -- and there are about 400 or so girls in our Stake!) So I've been secretly pinning my heart out with ideas for Girls Camp, and came across some really fun stuff by Amanda at jedicraftgirl, it's so nice to have a resource like that! I made my boards public this morning, since I was sustained Sunday, and now that I'm in Young Women again, I thought I'd modify my original patterns for the youth as well.  They turned out so nice!

2016 Youth Theme - Young Women

2016 Youth Theme - Young Men

Specs
Fabric Requirements: one package of 15" x 18" 14 ct Aida will yield two different themes (just cut in half so you get two 9" x 15" pieces) -- trim as necessary after finishing the piece. I used white Aida for the boy version and oatmeal Aida for the girl version.

Floss: You can follow my color recommendations, or come up with your own!
For the boy version, I just used scraps of thread I had already used in other projects, but stayed pretty true to the colors in the cross stitch pattern.
For the girl version, I will use these six colors:
  • DMC White
  • DMC 745, Yellow - LT PALE
  • DMC 761, Salmon - LT
  • DMC 3712, Salmon - MED
  • DMC 3808, Turquoise - ULT VY DK
  • DMC 3825, Pumpkin - PALE
I didn't include beginner instructions for this pattern, since I've already put out something similar with the Young Women torch and Provo Temple cross stitches. If you need anything more than what I've included here, please let me know -- but I think any information you need will be either in this post or in those beginning instructions.

And once again, here are the links for each pattern:
2016 Primary Theme - Girl
2016 Primary Theme - Boy
2016 Youth Theme - Young Women
2016 Youth Theme - Young Men

I have to admit, I've already started on my own cross stitches -- I just couldn't wait for Conference to start! I really wanted to get one completely done so I could show it, and I just finished last night.  Here it is, in a 5" x 7" frame:

Please let me know if you complete any of these patterns. Just email me at smileynann@yahoo.com -- I'd love to see them!

Wednesday, September 23, 2015

Radio Silence

Hey everyone!
I'm sorry to say, this radio silence has gone on for much longer than I anticipated. I have so many blog post ideas, but just not quite enough time to follow through on them all. I decided early on in this blog that I didn't want to post JUST to post, but that I would make sure I have important content in each blog post. In addition, I am the Mama to a passel of kids that need my motherly attention, and for me that has to come first. As a result, sometimes I don't post for a while. I hope you'll forgive me. I have a few really fun ideas in the works -- and one super fun tutorial I'm hoping to publish this week in anticipation of General Conference -- so please be patient with me and my human-ness. See you in a few!
Natalie :)

Monday, July 13, 2015

#BFTPqal - Finished Top


I finished my Blocks from the Past quilt top! I'm pretty proud of myself -- I really wanted to do a big, fat sampler quilt (a la Camille Roskelley's Farmer's Wife quilt), but I've come to peace with a "time and a season" mentality, and it's just not the time or season for this project. I'm so glad I've done as much as I have, though, because someday it will be my time & season, and when it comes I'll remember all my mistakes! :)

If I had it all to do over again, I'd definitely make this quilt differently than prescribed in the book -- almost every block that I made with Marie Henry's instructions had major problems. A few were too big, so I had to chop off my points, and one was almost 1/2" too small -- and I was REALLY careful with that one! For the most part, I'd probably paper-piece most of these blocks. If you do that, you end up with a perfectly sized block, with minimal mistakes.

One thing I'm super pleased with, however, is how I went out of my comfort zone color-wise. I used a whole lot of colors I wouldn't normally use together, and BLACK -- I've only made one other quilt with black, and it was a black-and-white quilt! There are a couple of blocks I'd change if I hated them more, but all things considered, I love it!

(Isn't this a lovely artsy shot? I've been playing around with my camera a bit, and it's really fun to try new compositions! For example, in this shot you can't tell that my sewing room is a COMPLETE DISASTER...)
 
One little trick I have is to make the binding after I'm finished with a quilt, especially if I'm doing a scrappy binding. If I make a regular binding, I don't mind making the it before I start the quilt, but with a scrappy one I'm always nervous I won't have enough fabric for my quilt top if I make the binding first. BUT... if I don't make the binding right after I've made the quilt, then I have to keep all that lovely fabric separate from my regular fabric stash, and I can't use it for anything else! So, I measure the sides of the quilt, add 15-20", and make enough binding to cover the quilt, give or take a couple of inches. Then I can stuff it into my fabric bins neatly put away my fabric, and I'm all ready for another project!

Monday, July 6, 2015

#BFTPqal -- Layout and Setting

This week it’s my turn to talk to you all about my layout and setting squares for my #BFTPqal quilt – I can’t believe we’re already at this point! Remember when I told you all I was doing a different layout than in the book? Well, just like always, my plans changed a couple of times since then, and I decided instead to use the blocks I’d made to make a really great baby quilt/wall hanging – which I may or may not give away, it’s so cute!

The first thing I did to lay out this quilt was to put everything up on my design wall, and arrange the blocks the way it looks most pleasing to me.
 
Next, I decided to use a white sashing, so I cut as many as I needed, exactly as it said in the book. I played around with the idea of using the prints for sashing and having plain white squares, but now that I’ve laid it all out, I’m super pleased with how it’s going!
Before I cut them all out, I arranged the prints on my design wall, with the blocks in the middle.

Once I found an arrangement I liked, I took a picture so I wouldn’t forget my order (have I ever mentioned that I’m a little OCD when I’m laying out everything? I guess I’ve made plenty of mistakes and want to get those out in the planning phase).
 
I decided to make my setting triangles a little bit bigger than in the book, just for insurance, so I cut out my corner triangles with 6 ¾” sides (cut on the diagonal).
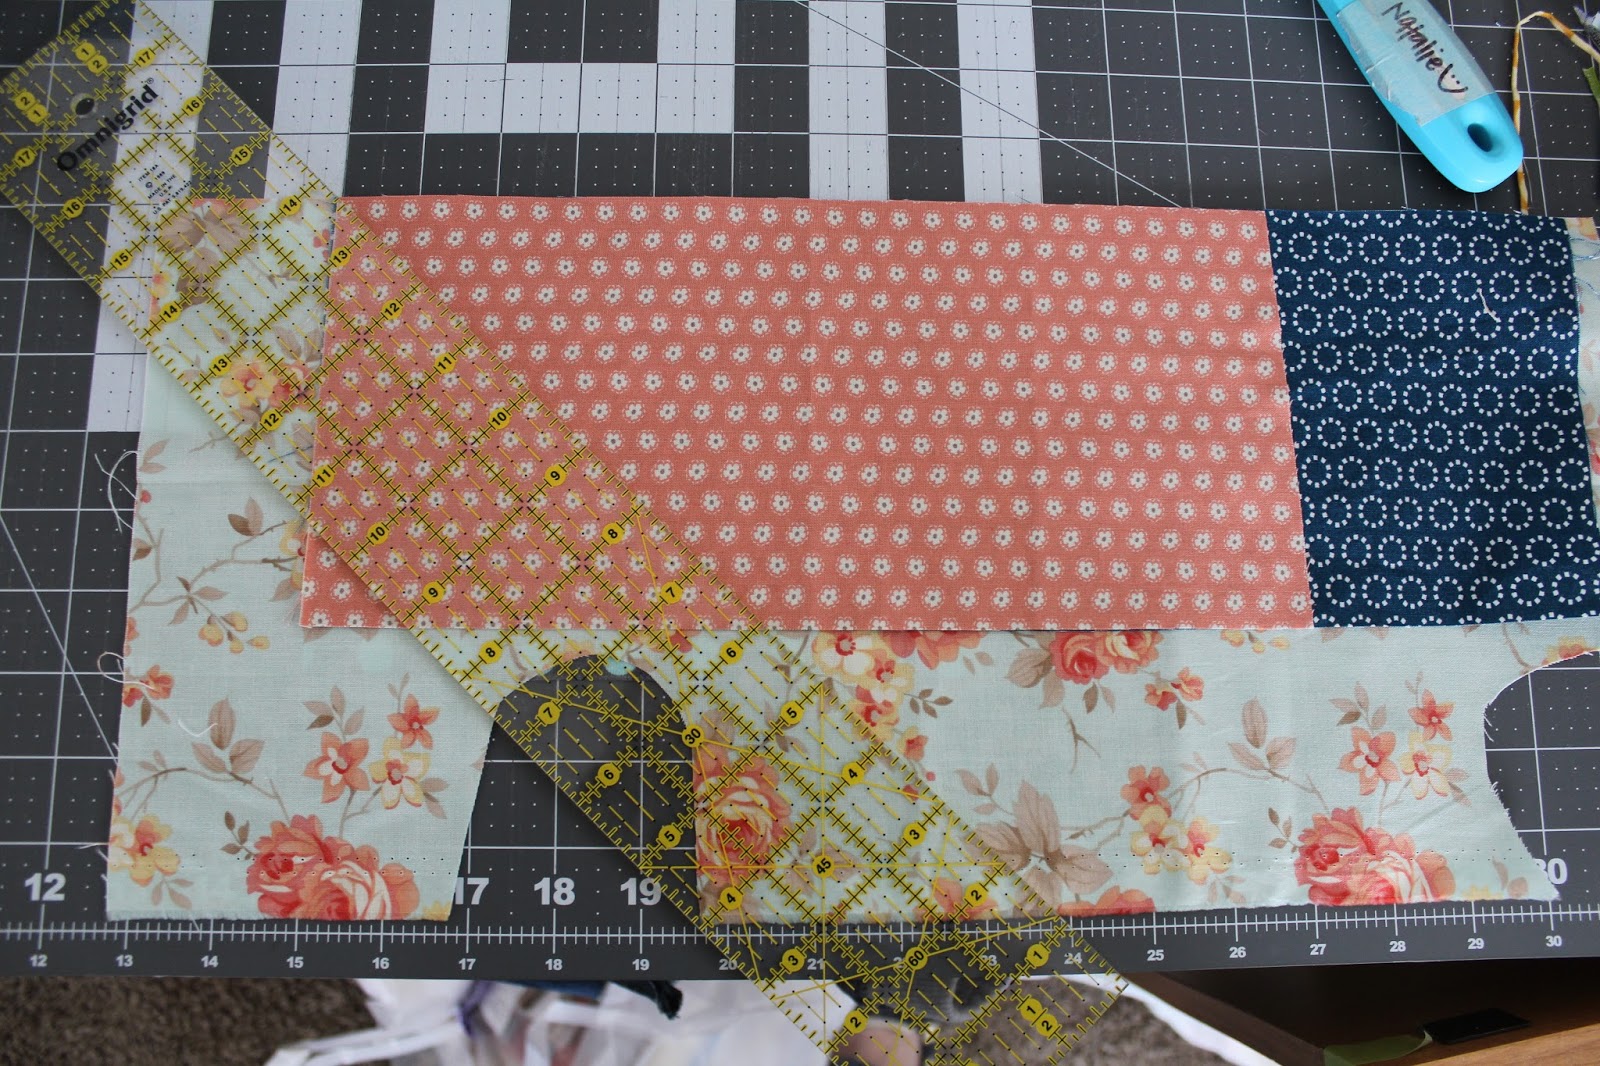
For the side setting triangles, I cut my fabric roughly 5 ½” x 11”, then arranged them on my cutting mat so the outer side was along a 1” mark on my mat. I’ll be honest, I wasn’t too picky about which side was “up”, but if you’re wanting to be careful about it, then the outer side of the setting triangle should be at the top of your cutting area. Also, please disregard the bottom fabrics – I wanted to lose as little as possible to waste, so I used some funky-shaped pieces, and they’re a little special. :) I lined up the left edge so the top corner was on or close to a place on the mat where the 45-degree angle is intersecting a 1” mark, then cut on that 45-degree line.

Then I measured over 11” along the top line, and made sure the other edge of my ruler was 5 ½” away from the top edge of the fabric.

That makes a perfectly square, bias-in-the-right-place, cute corner setting triangle, a little bit bigger than it needs to be so I have a little playing room when it comes time for quilting.
And here’s the finished layout:

I can’t wait to get this pretty little quilt top done! But I have a couple of other deadlines that need to be met first, so I’ll be showing off the top next week, when Marion rounds up the last little bit of this fun project. I can’t wait to see how everyone’s quilts have turned out!


Monday, June 29, 2015

#BFTPqal with Katie

Oh my goodness -- this is the LAST WEEK of tutorials! I can hardly believe we're at this point, doesn't it seem like we just started? For this week's tutorials, go to Katie's blog HERE.

Monday, June 22, 2015

#BFTPqal with Marion

This week is back at Marion's blog -- and do you feel like we're getting close? Last week will be the last week of tutorials, and then we're on to construction tips. It's going to be EPIC!

Thursday, June 18, 2015

#BFTPqal with Tiffany

This week will be my friend Tiffany at Always Sewin' Somethin'. She's so adorable -- and BRAVE. She has 2-year-old twins, and just had another baby! Oh, I'm tired just thinking about it -- but hopefully things will be a little easier this time with just one little bundle of joy. :)